Roller blinds are popular with homeowners and tenants for room makeovers. These stylish and functional window treatments provide seclusion, regulate light, and enhance the room’s appeal. Many are wary of drilling holes into walls or window frames during installation. Luckily, you can install without the drill and still be secure and stylish. This detailed instruction will let you install roller blinds without drilling for a clean, reversible look in any situation.
The Charm of No-Drill Installations
Innovative, non-invasive mounting technologies define no-drill roller blind installations. These solutions, such adhesive hooks or tension rods, retain well without requiring permanent adjustments to your home. This method appeals to renters and individuals who don’t want drilled holes. Gather the necessary equipment and materials for this adventure.
Essential Tools and Materials:
- Your chosen roller blinds, complete with all components
- High-quality adhesive hooks or tension rods, selected based on the weight of your blinds
- Tape measure for accurate measurements
- Spirit level to ensure your installation is perfectly horizontal
- Pencil or marker for precise marking
- Cleaning supplies (e.g., mild detergent or alcohol wipes) for surface preparation
Preparing for a Smooth Installation
A well-prepared surface is key to no-drill installation success. Make sure the adhesive hook region is clean first. Dust, grease, and moisture degrade adhesives, thus this step is vital. Cleaning and drying ensures the strongest connection. This step prevents tension rods from slipping.
Selecting the Ideal No-Drill Solution
Adhesive Hooks: Strength Meets Versatility
You must choose sticky hooks that can comfortably support your blinds. Consider using many hooks evenly spaced for wider windows to share load. For a long-lasting hold, choose an adhesive that matches your wall or frame material.
Tension Rods: Simplicity and Elegance
Tension rods, which use window frame tension to fasten blinds, are great for inside mounting. They are beneficial for windows when glue is impractical. Choose a rod that fits your window width and supports the blinds.
Detailed Installation Steps
Step 1: Precision Marking
Use your tape measure and level to precisely position your adhesive hooks or tension rod ends. Precision ensures straight, functional blinds.
Step 2: Setting Up the Mount
Remove the backing from adhesive hooks and push them against the designated spot for 30 seconds. Before hanging the blinds, allow 24 hours for curing. A secure installation requires time.
Tension rods should fit snugly in the window frame. It takes some trial and error to get the tension perfect so the rod stays in place without destroying the frame.
Step 3: Hanging the Blinds
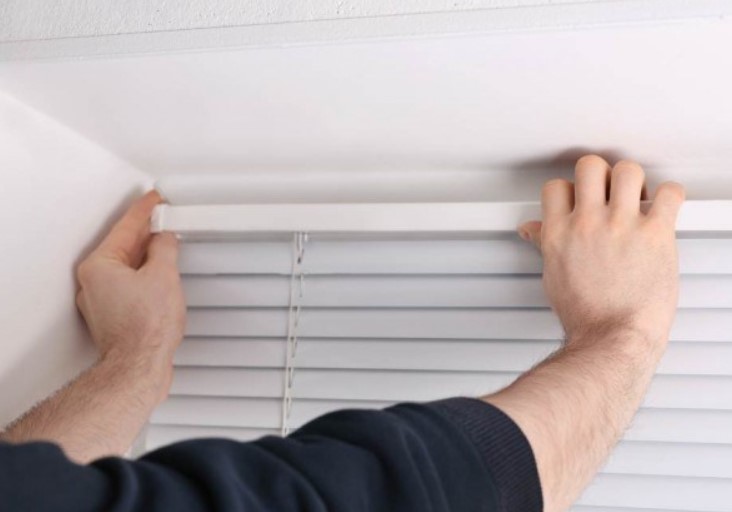
Attach your roller blinds to the hooks or slide them onto a tension rod according the manufacturer’s directions. Adjust the blinds for levelness and smooth operation.
Step 4: The Final Touch
With the blinds installed, take a moment to appreciate your handiwork. Adjust the blinds to your desired position and enjoy the enhanced privacy, light control, and visual appeal they bring to your space.
Pro Tips for a Flawless Installation
- Always check the weight capacity of your no-drill solution to avoid accidents.
- Give adhesive hooks time to adhere well.
- For a coherent effect, choose hooks or rods that perform their purpose and match your decor.
Benefits of installing roller blinds without drilling
Installing roller blinds without drilling is like uncovering a secret method that enables you enjoy these beautiful and functional window coverings without making permanent home adjustments. This procedure is great for tenants and anyone who wants clean walls and windows. Let’s examine the advantages of drill-free roller blind installation.
1. Prevents Wall Damage
The main benefit is protecting your walls from drilling. No holes mean no patching or painting if you relocate or change your decor. Like having your cake and eating it too, roller blinds provide privacy and style without damaging your walls.
2. Easy-to-install
Simply stick a sticker on your notebook. Installation is easier with sticky hooks or tension rods. No power tools or expertise needed. The DIY dream may be realized in a few stages, making it ideal for weekend projects or rapid space makeovers.
3. Great for Renters
For renters, drill-free installation is revolutionary. Since many landlords frown on or ban permanent alterations, choosing roller blinds without drilling is prudent. It lets you fully customize your area within your leasing agreement.
4. Changeable Mindset
Our tastes fluctuate with trends. Changing drill-free roller blinds whenever you want is fun. This method makes it easy to switch blind styles without drilling new holes or hardware, whether you’re upgrading your room’s motif or controlling seasonal light.
5. Economical
You can save money and walls by not drilling. You save money by not using heavy-duty hardware or employing specialists to install your blinds. This installation method uses inexpensive adhesive hooks or tension rods, offering it a budget-friendly way to update your home.
6. Safety First
Safety is paramount for households with children and pets. Drill-free roller blinds reduce installation mishaps by eliminating power equipment. Many no-drill solutions are simply removable, making it easier to keep cords and chains out of reach of kids.
7. Temporary to Permanent
No-drill roller blinds may seem ephemeral, yet many find them durable. Top-notch adhesive hooks and tension rods can keep your blinds in place for years. This adaptability makes drill-free blinds a quick and durable fix for many.
Conclusion: A Drilling-Free Reality
Installing roller blinds without drilling is simple and can transform any area. This no-drill solution is revolutionary for renters and people wary of permanent home improvements. This comprehensive tutorial lets you confidently install roller blinds and enjoy their benefits without drilling. Use new roller blinds to update your room with this inventive method.


