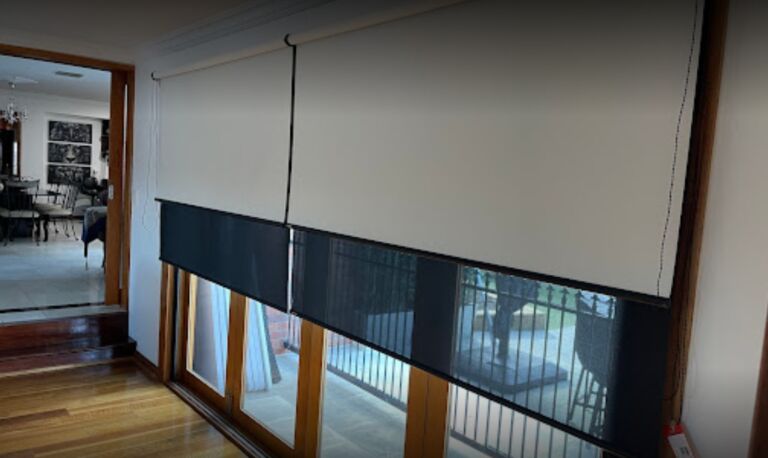
Want to refresh your roller blinds?No worries, mate! The roller blind system could be replaced as fast as a toast sticking in the barbeque with the right guidance. To begin with, take your tools and the new gadget; remove the blind from its mounting brackets then get rid of that old rotten mechanism. Now we get to fitting that new one like a glove – let it be as snug as a bug in a rug and the roll will be as smooth as a kangaroo on the hop. Have a test-run, adjust after, then put that blind back up, and make sure that everything is tidy, and of course safety is a top priority. Using this handy-dandy guide, or your get hire any roller blinds Melbourne professional for 100% awesome work.
Steps by Step Guide To Replace Roller Blind Mechanism
Follow this steps one by one to replace your indoor or outdoor roller blind mechanism.
Step 1. Assessment and Preparation
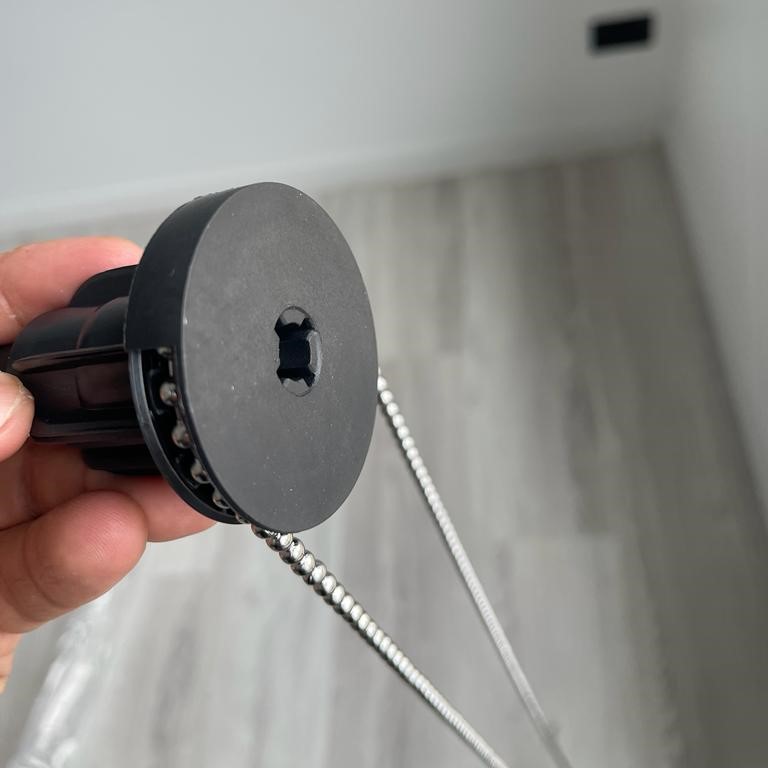
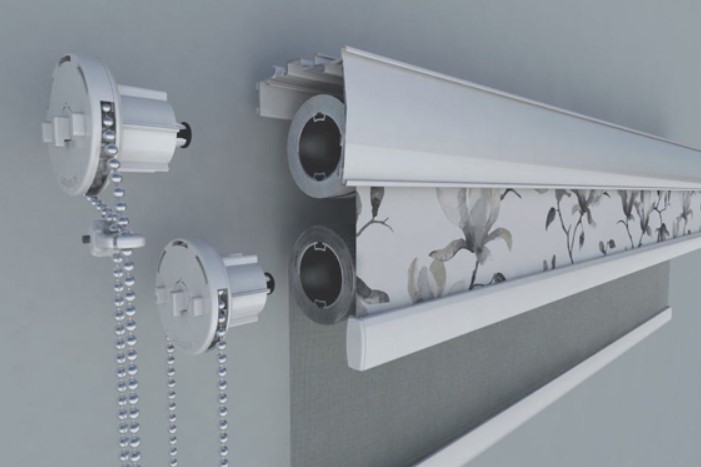
Their are lots of types of roller blind mechanism and for all of them you need separate tools and spare parts before you jump into the replacement. Take the handy screwdriver, maybe the drill if required, and the new roller blind mechanism as well. Find a minute to unhook the blind from its mounting brackets and lay it flat on a surface for simple access. You will need enough elbow room for this DIY project.
Step 2. Disassembly of the Old Mechanism
Let’s say goodbye to the old roller blind mechanism first. Pry off those end caps like they were the cap to a nice cold one you just popped after a long day. Neatly pull out the old roller tube the fabric from the fabric with care, avoiding getting or tearing anything. Keep in mind any electric cords or metal chains connected to the old mechanism, and kindly disconnect them. Finally, disassemble or take off the old mechanism from the brackets or mounting hardware– as easy as throwing another shrimp on the barbie!
Step 3. Installation of the New Mechanism
The interesting part, i.e. installation of the shiny new roller blind mechanism now follows. Place it tightly in the spot of the former one so that it lies firmly on the brackets or mounting hardware. Do a proper tightening with your screwdriver ensuring it’s as solid as a koala on the run. After that, reconnect any cords or chains to the right mechanisms on the new roller ensuring that all is aligned correctly. Slide that roller tube back into the fabric as if you’re a hands down winner, ensuring it rolls like a flowing river.
Step 4. Testing and Adjustment
Go on then, test that thing you have made! Provide a few good pulls out for the blind to discern whether the new thing gives a dreamlike performance. Look for any wonky bits or misalignments – we need this blind to be a staright as a didgeridoo. As long as you have any problems with tension issues or some strange/shaky movement there’s no issue at all! A couple of tweaks here and there will get it done. Test the blind a few times to make sure it is operating as the tinny on a calm arvo.
Step 5. Final Installation
All done now, so the window shade can be restored where it was. Replace those end caps on the roller blind as if you’re kissing an envelope. Mount the blind back onto its brackets or mounting hardware ensuring it is tight as a tick in a pick. Give it the all-clear at the final sweep to ensure that it’s altogether tidy and good to go.
Step 6. Cleanup and Maintenance
Toss out any outdated / old parts or packaging materials – we won’t have any clutter messing us up. Clean the place of the blind well, getting rid of all the dust and cobwebs. And remember, TLC (tender, love and care) goes along way so take care of your window blind mechanism for years of smooth operation.
Step 7. Safety Precautions
Remember that safety must come first things first. Adhere to all safety norms and user manuals fully. Handle all tools and parts cautiously to prevent any unwanted incidents. And keep in mind that you can always get help if you’re uncertain about anything — there’s no need to feel awkward about reaching for a supporting hand; if you can’t solve the problem on your own, there’s nothing wrong with hiring a professional.
Conclusion
And, ladies and gentlemen, there you have it – an authentic Aussie’s guide to replacing your roller blind mechanism. A little elbow grease, and a take charge attitude, and you’ll have those blinds looking like brand new in no time. So then, don’t delay, gather your tools, slap on your DIY chapeau, and prepare to take on that home improvement job like a real fair dinkum legend!